Run Cosmos with the Astro CLI#
Work locally with Apache Airflow®, dbt, and Astronomer Cosmos using the Astro CLI. While Cosmos fully works with standard Airflow and independently of the Astro CLI, the Astro CLI can simplify creating and running Airflow projects. If you want to get started with Cosmos using only Airflow, see Getting Started on Open Source Airflow.
This guide shows you how to run a simple Dag locally with Cosmos, using an example dbt project in Airflow.
By the end of this quickstart you will:
Download the Astro CLI
Set up the Astronomer Cosmos demo project, cosmos-demo
Run a simple Dag that uses dbt to load, run, and test sample e-commerce data
Prerequisites#
Install git
Install the Astro CLI
A container manager such as Podman, Docker, or Orbstack. When you install the Astro CLI, it automatically installs Airflow and Podman, so you can immediately start working with Dags after installing the CLI. If you need to use Docker instead of Podman, see Switch between Docker and Podman.
(Optional) Install a database viewer. This guide uses dBeaver
Depending on your operating system, you might also need to install a separate installation manager like Homebrew or WinGet.
Clone the demo repo#
Open a terminal in the directory where you want to clone your sample repo.
Clone the
cosmos-demorepo.
git clone https://github.com/astronomer/cosmos-demo.git
Start Apache Airflow® locally#
Open a terminal at the root of the
cosmos-demorepo.Run
astro dev start --verbosity debugto start your Aiflow instance. Including the--verbosity debugflag allows the command to display the steps the Astro CLI takes to set up your Airflow project.Open the Airflow UI at
http://localhost:8080/.Log in using
adminas both the user name and password to access the Home view. This view provides at-a-glance of your overall Airflow environment, including summary statistics about your Dags’ performance.
The Airflow UI enables you to start, stop, troubleshoot, or manage your Dags.
Run a simple Cosmos Dag#
From the Airflow Dashboard, click Dags. This opens a view where you can see all available Dags. Or, you can see if there were problems loading Dags to your Airflow project.
Select Simple Dag from the list to access the Dag view in the Airflow UI. Click Code to see the Dag code.
simple_dag = DbtDag(
    # dbt/cosmos-specific parameters
    project_config=ProjectConfig(jaffle_shop_path),
    profile_config=airflow_db,
    # The execution_config matches the dbt execution virtual environment defined in the Dockerfile
    execution_config=venv_execution_config,
    # normal dag parameters
    schedule="@daily",
    start_date=datetime(2023, 1, 1),
    catchup=False,
    dag_id="simple_dag",
    tags=["simple"],
)
Click Trigger to run the Dag.
After the Dag finishes executing. You can select one of the Dag tasks to look at the task Logs.
In the task logs, you can identify the dbt actions that Cosmos initiates during the Dag.
For example in the stg_customers, task group, in the run task, the logs include output like:
...Running command: ['/usr/local/airflow/dbt_venv/bin/dbt', 'run', '--select', 'stg_customers', '--project-dir', '/tmp/tmp8675309', '--profiles-dir', ...]
This log indicates that the Dag triggers Cosmos to initiate the dbt run command following the sql actions defined in the stg_customers.sql.
View results with a database viewer#
To view the transformations completed by the Dag, you must use a database viewer to access the views and materializations completed by your dbt project.
Open dBeaver.
Click Database on the main menu and then New database connection.
Select PostgreSQL from the list of database types.
Add your database connection information. The
cosmos-demoproject uses the postgreSQL container that also includes the Airflow metadata database to execute the dbt code. For this project, the postgres connection information is defined in theprofiles.ymlfile:
airflow_db:
    target: dev
    outputs:
        dev:
        type: postgres
        host: postgres
        user: postgres
        password: postgres
        port: 5432
        dbname: postgres
        schema: dbt
        threads: 4
You have several options to locate this kind of information in dbt projects. For example, the cosmos-demo project shares this port, username, and password information in the profiles.yml file, and the Astro CLI prints it in your terminal after you run astro dev start. When you create your own project, you can use the profiles.yml file to configure how your dbt project connects to your database.
Click Finish. dBeaver asks for permission to download the necessary drivers to access and display the database information.
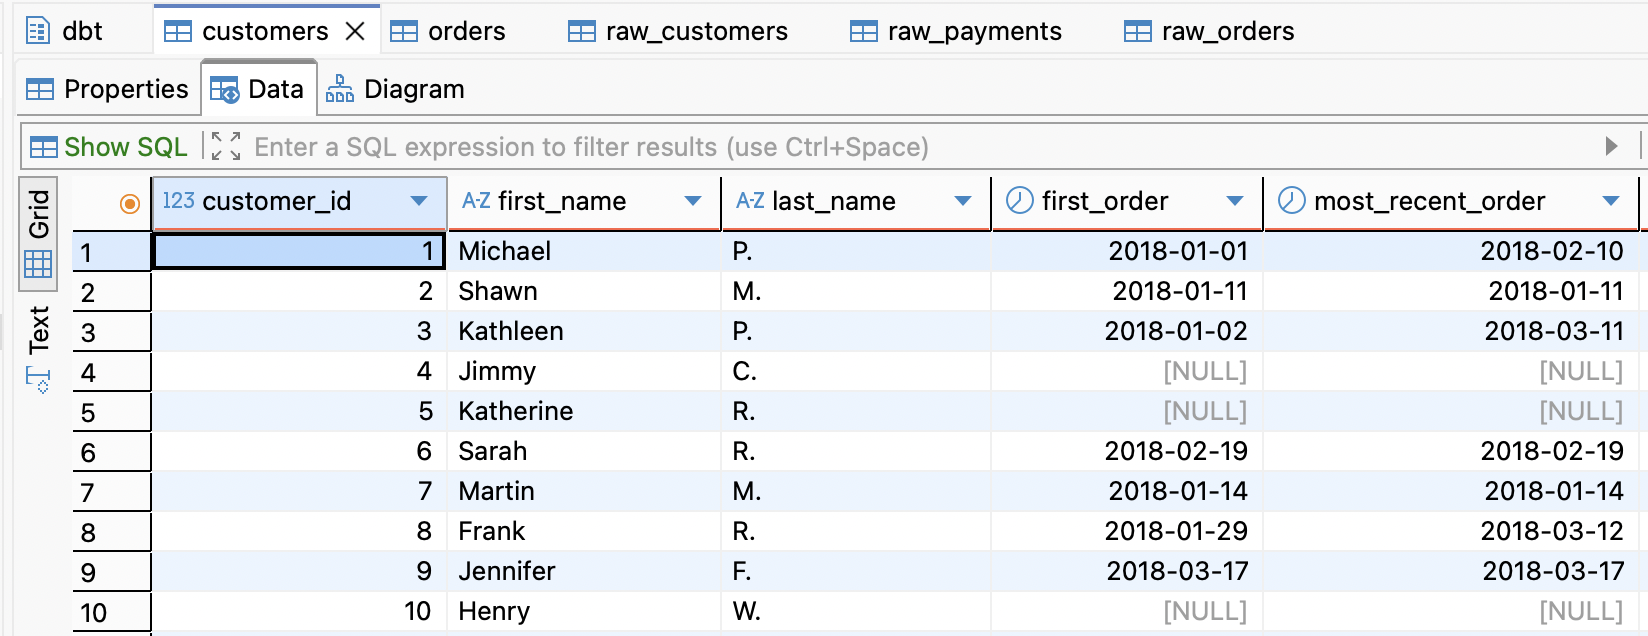
After the connection is successful, dBeaver displays the postgres project directory. Navigate to Tables at
postgres/Databases/postgres/Schemas/dbt/Tablesto view the different table views created by dbt.Customers and Orders are the final Table views produced by the dbt code. But click any of these tables and then choose the Data tab to see the dbt output.
Key Concepts#
Congratulations! You ran a dbt project successfully on Airflow! This quickstart includes the minimal steps required to get started working with Cosmos. Specifically it includes:
A dockerfile that defines
- The Astro Runtime to use for the Airflow project
- The virtual environment where you want to run dbt command
- The connection to the postgres Airflow metadata database
This demo repo also includes a dbt project with configurations that allow you to explore how Cosmos enables Airflow and dbt to work together. These files include:
constants.py: Points to the dbt project root directory and to the virtual environment configured by the dockerfile that the dbt project uses to execute commands.profiles.py: Contains the profile mappings that allow your dbt project to connect to the Airflow metadata database defined in the Airflowdockerfile, where Cosmos runs dbt models for this project.
Cosmos does not require you to use the specific project architecture shown in the cosmos-demo to run successfully. However, it can serve as a template or example for you to adapt your dbt or Airflow projects to work cohesively.
Next steps#
- Follow one of the Getting Started Guides where you can bring your own dbt projects and/or Dag code: